How You Know if Your Photo Is Sharp

One of the things that makes photography frustrating is softness and blur in pictures. Sharp photos are much more appealing than soft images. It is very disappointing when you accept a moving picture of a special moment and images come out soft/blurry or out of focus. And then, in this article, I will go through the techniques I use to make sure that my images ever come out tack sharp.
Let's get-go with the reasons why an paradigm might come out blurry:
- A long shutter speed can capture camera shake, which would produce a blurry image
- Your discipline could be moving and causing motion blur, fabricated worse by a long shutter speed
- Poor focus acquisition would result in a soft epitome
- Yous might take a bad lens or a lens that is not capable of producing sharp photos
- Your ISO could be set to a very high number, resulting in lots of noise and loss of detail
In order to resolve these issues, y'all need to address them all at the aforementioned time, which volition help attain optimal sharpness. There are a few other causes of blurry photos, too, which I will cover below.

Table of Contents
How to Take Abrupt Pictures
1. Set the Right ISO
Start with setting your camera to the lowest ISO "base" value (in my Nikon camera it is ISO 200). Remember that the photographic camera base ISO will produce the highest quality images with maximum sharpness. The college the ISO (sensor sensitivity), the more than noise you volition see in the epitome. I advise reading my commodity on agreement ISO.
2. Employ the Manus-Property Rule
If you have a zoom lens that goes across 100mm, I would recommend applying the general hand-belongings "dominion", which states that the shutter speed should exist equivalent to the focal length fix on the lens, or faster. For example, if y'all have your lens zoomed at 125mm, your shutter speed should be at least 1/125 of a 2nd.
Keep in mind that this dominion applied to 35mm film and digital cameras, and then if yous own an entry-level DSLR or mirrorless photographic camera with a crop factor (not full frame), you lot need to do the math appropriately. For Nikon cameras with a ane.5x crop factor, just multiply the result past 1.5, whereas for Canon cameras, multiply by 1.6. If yous have a zoom lens such as the 18-135mm (for Nikon DX sensors), set the "Minimum Shutter Speed" to the longest focal range of the lens (135mm), which is i/200 of a 2nd. Hither are some examples:
- 50mm on Nikon DX (D3500/D5600/D7500): 1/75 (50mm x i.5)
- 100mm on Nikon DX (D3500/D5600/D7500): ane/150 (100mm x 1.5)
- 150mm on Nikon DX (D3500/D5600/D7500): 1/225 (150mm x i.five)
- 200mm on Nikon DX (D3500/D5600/D7500): 1/300 (200mm 10 one.v)
- 300mm on Nikon DX (D3500/D5600/D7500): 1/450 (300mm 10 i.5)
Remember that this only affects mistiness fromcamera shake. If you are taking pictures of a fast moving subject, yous very well may need a quicker shutter speed than this in order to get a sharp moving-picture show.

iii. Choose Your Camera Mode Wisely
When I'm taking pictures in low light, 99% of the time, I shoot in Discontinuity-Priority mode and fix aperture to the widest setting on my lens – the maximum aperture, AKA the smallest f-number. This is ordinarily in the range of f/ane.4 to f/five.vi depending on the lens. (For example, with the Nikon 35mm f/1.8 lens, I volition set up the aperture to its maximum value of f/ane.8.) The photographic camera automatically meters the scene and guesses what the shutter speed should be to properly betrayal the image. You lot tin can easily adapt the camera'due south guess with exposure bounty. So, set your camera to aperture-priority mode and set the discontinuity to the everyman possible f-number.
Set your metering to "Matrix" on Nikon or "Evaluative" on Canon, and so that the whole scene is assessed to judge the correct shutter speed.
4. Pick a Fast Plenty Shutter Speed
After you set your camera to discontinuity priority and choice the correct metering manner, point it at the field of study that you want to photograph and half-press the shutter. Doing so should bear witness y'all the shutter speed on the bottom of the viewfinder.
- If the shutter speed is showing ane/100 or faster, you should exist good to go, unless anything in your photograph is moving quickly (or if yous're using a long telephoto lens; remember the hand-holding dominion). Snap an epitome or ii and see if you are getting any blur in your image. I typically review my images on the dorsum of the camera at 100% and make sure that nothing is blurry. If anything in your photo is blurry – the entire paradigm, or just one fast-moving bailiwick – employ a quicker shutter speed similar 1/200 or one/500 second.
- On the other manus, if the shutter speed is below 1/100, information technology might mean you simply do non have plenty light. If y'all are indoors, opening upwardly windows to let some calorie-free in or turning the lights on will assist to increase your shutter speed. It is still possible to capture sharp photos faster than 1/100 2nd handheld, just it becomes increasingly more hard the longer your shutter speed is.
5. Apply Loftier ISO in Nighttime Environments
If you are still getting blurry images, attempt to hold the photographic camera steady without shaking information technology too much and take another motion picture. If that doesn't assist, set a fast plenty shutter speed to capture abrupt photos, and raise your ISO instead. You can do this via Auto ISO (described in the next section) or manually increasing ISO. In dark environments, information technology is non unusual to utilise quite a high ISO in club to go a fast enough shutter speed. Although this adds more than noise/grain to a photograph, that is usually ameliorate than capturing a blurry paradigm.
6. Enable Motorcar ISO
Many cameras today have an "Auto ISO" feature that is very useful for capturing abrupt pictures. So, set information technology to "On." Fix your Maximum Sensitivity to ISO 1600.
If you take the option to select a minimum shutter speed, set it to "Automobile" equally well, which automatically applies the hand-belongings rule! If you don't have this option, fix "Minimum shutter speed" to 1/100 second.
This is a useful characteristic because, if the amount of light inbound the lens decreases and the shutter speed goes below one/100 of a 2nd, the photographic camera automatically increases ISO to continue the shutter speed higher up 1/100 of a second, or above the hand-holding rule.
If you have shaky hands, I would recommend bumping up the "Minimum shutter speed" to something like 1/200-ane/250. Or if you lot have the "Auto" minimum shutter speed option, prioritize it toward "faster" but to be on the safety side. Also see our divide commodity on how to hand-concur a camera as stable every bit possible.
Some cameras don't accept an Auto ISO characteristic. In that case, you will have to accommodate ISO manually to do the aforementioned affair. Just raise your ISO in darker environments to keep your shutter speed at a reasonable level. I don't recommend raising the ISO to a higher place ISO 1600 or perhaps ISO 3200. Why non? Quite simply, anything higher than that in an entry-level DSLRs produces too much noise, which has a negative affect on overall epitome quality. On older-generation DSLRs such as Nikon D90/D200/D3000/D5000, yous might desire to keep the maximum ISO to 800.
7. Hold Your Camera Steady
While hand-holding your camera, in that location is a direct correlation between the photographic camera shutter speed and blurry images. The longer the shutter speed (specially beneath 1/100 of a second), the college the take chances for blurrier images. Why? Because while paw-holding a camera, factors such equally your stance, breathing, camera paw-belongings technique all play a huge role in stabilizing the camera and producing shake-free images.
Think of it as holding a rifle on your hand. Yous wouldn't want to move around while trying to shoot – you lot demand to stand as steady and stable as possible, pull the stock tightly into the shoulder, exhale, and then shoot. The same technique works great for your photography, peculiarly when yous accept to deal with slow shutter speeds.
I recommend holding the photographic camera simply similar yous would concur a burglarize (except your right hand goes on the shutter instead of the trigger), with ane of your legs on the forepart and your trunk residual spread beyond both legs. I personally exhale when I shoot long shutter speeds handheld, like 1/10 second, and it does help me to go sharper images. Endeavor it and meet how information technology works for you lot. The divergence between shooting a photographic camera versus a rifle, is that yous can at least adjust the shutter speed to a higher number and avert camera shake, whereas you cannot do the same on a gun.
8. Focus Carefully on Your Subject
Learn how to focus correctly and deal with focusing issues. This one is very of import, as your camera focus straight impacts image sharpness. The first thing you need to learn is how to differentiate betwixt a photographic camera milkshake/motion blur and a focus problem.
If the subject area in your prototype is blurry, but something closer to the photographic camera or further away is perfectly in focus and abrupt, it is most likely a focus issue. If the whole image is blurry and cypher is sharp, information technology is generally due to using too long of a shutter speed handheld. And lastly, if a fast-moving object in your photo is blurry/streaky in the direction of travel, then your shutter speed is not fast plenty to eliminate subject motion. That isn't a focus problem; use a faster shutter speed.
If you are having problems acquiring a good focus, here are some things that I recommend for you:
- Lack of light tin cause auto-focus malfunction, resulting in inaccurate focus acquisition past the camera. Make sure at that place is plenty of lite for your camera to properly focus.
- The centre focus bespeak is generally the most accurate in cameras. If you are having problems acquiring focus because your focus bespeak is elsewhere, I recommend moving information technology back to the heart, focusing, and recomposing.
- Many cameras let you lot select a separate button for focusing, without touching the shutter release button. I set my camera this way, focusing exclusively with my thumb, while pushing the shutter trigger with my index finger. This is known as back-button focusing. It takes some time to get used to dorsum-push focusing if you lot're familiar with half pressing the shutter button instead. However, you may detect it useful in one case you lot try it out.
- The photographic camera autofocus system works past looking at the contrast around the focus area. For example, if y'all endeavor to focus your camera on a make clean white wall, information technology will never be able to acquire focus, because the camera will non come across any areas of dissimilarity. On the other hand, if you have a white wall with a dark object on information technology and y'all put your focus betoken in betwixt the wall and the object, your camera will instantly acquire right focus. My recommendation is to place the rectangular focus point on an area with the most contrast. Examples are: edges of objects, lines separating different colors, numbers and letters printed on objects, etc.
- Focus multiple times until you can conspicuously see in the viewfinder that the object is in focus. For this one, yous need to have a good viewfinder and a practiced vision. Some entry-level DSLRs accept a very modest viewfinder, making information technology hard or sometimes fifty-fifty impossible to run across if yous are getting correct focus. Unfortunately, in that location is not much you can do if you cannot tell if the subject area is in focus by looking into the viewfinder, and so just take multiple pictures while constantly re-adjusting the focus and review images on the camera LCD.
9. Reduce Move Mistiness in Your Discipline
If y'all are photographing a person, tell them to freeze and not move while yous take their picture. When you piece of work with ho-hum shutter speeds, even if you do everything right, your images might still come out blurry just because your field of study moved while the shutter was open. This is chosen motion blur. Sometimes people like the effect of the motility blur, especially for high-speed objects like cars. To reproduce this effect on your photographic camera, set your camera to Shutter-Priority mode, then set your shutter to 1/100 of a second or less. Inquire your subject to move his/her hand quickly, while non moving the body. The effect should be a sharp picture of the person's body, while having a motility blur on his/her hand.

As you tin meet from the to a higher place image, everything in the image is sharp, while the fan is blurred through motion blur, which I specifically created past shooting the image in low shutter speed of 1/xx of a 2nd (the image was shot hand-held).
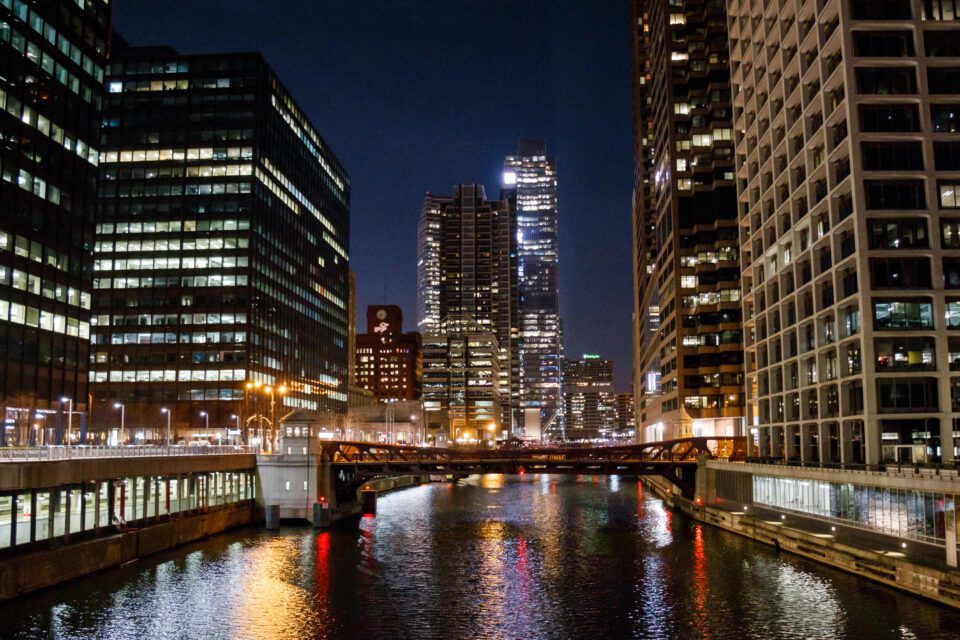
Here is some other example of motion blur that I shot at dark on a tripod (shutter speed is 2 seconds):

So, if you desire motion mistiness, utilise a long shutter speed similar 1/10 second or even several seconds (if y'all're using a tripod). But you'll usually want to avoid motility blur when taking pictures of people or action, then brand sure to use a fast enough shutter speed. The paw-holding dominion doesn't apply if your discipline is moving very quickly, because it is all nearly eliminating camera milk shake blur, not motion blur from your subject. For photos of hummingbirds, for case, I might set 1/k second or 1/2000 second and still get some blur in the wings!
10. Turn On Vibration Reduction
Brand sure that your vibration reduction (VR on Nikon) or image stabilization (IS on Canon) is set up to "On" on your lens, if you lot accept information technology. Many of the consumer zoom lenses have some sort of anti-shake/vibration reduction engineering science in them, allowing one to shoot at lower shutter speeds and notwithstanding go sharp images. If you have 1 of those lenses, get alee and endeavor lowering your shutter speed to a lower value. You tin even lower down the "minimum shutter speed" in your Car ISO settings to something similar i/50 of a second and still become abrupt images.
eleven. Use a Faster Lens
Get a skilful fast prime number lens such equally the Nikon 35mm f/1.8 DX or 50mm f/i.iv / f/i.viii lenses. These prime lenses are relatively inexpensive, ranging between $200 to $400 for the f/1.four model.
Very few zoom lenses tin can achieve the same optical quality as the prime lenses, because prime lenses accept simpler design and are optimized to perform for only one focal range. Although y'all lose the ability to zoom in and out, prime lenses are much faster than most zoom lenses and are fantabulous choices for low-light and portrait photography.
Because of the shallow depth of field, prime lenses are also capable of producing pictures with cute bokeh (nicely blurred backgrounds). When I got my easily on my first prime lens, I but could not believe how much of a difference information technology made in terms of sharpness. If you lot take never used a prime number lens before, requite it a endeavour and yous volition non regret it.
12. Use Depth of Field Strategically
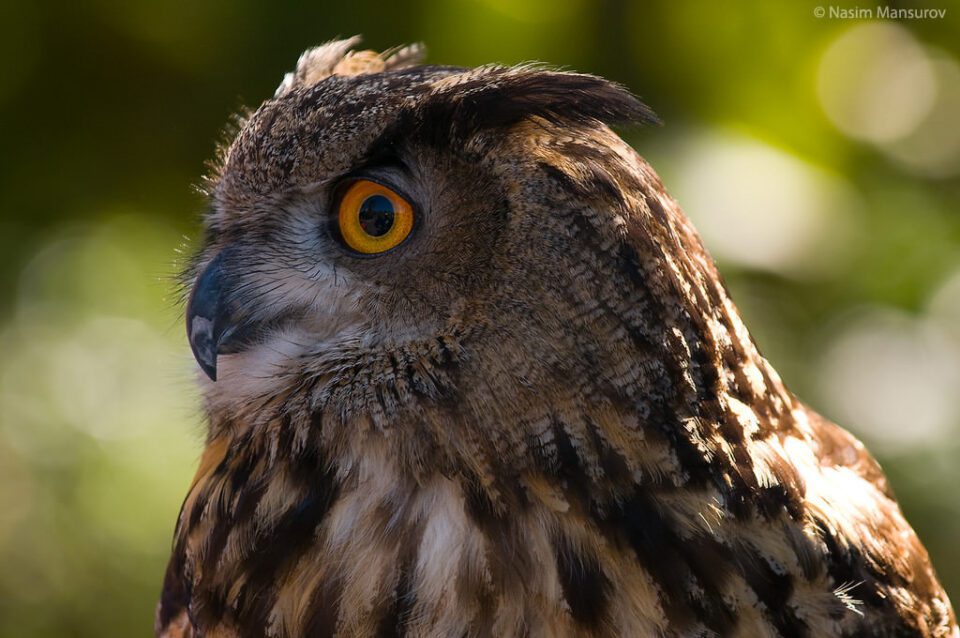
When photographing people or animals, ever focus on the closest eye to y'all. This is very important, especially when dealing with large apertures between f/one.4 and f/ii.viii, because your depth of field will be very shallow. Equally long every bit the eye of the subject is sharp, the image volition almost probable be acceptable. Take a look at this photograph of my son Ozzy:

Usually, I delete images similar this, just I'm glad I kept information technology for this commodity. Every bit you can run into from the in a higher place image, I failed to acquire correct focus on Ozzy'due south centre and somehow focused on his hair instead. Now, compare it to this epitome:

Such a big difference between the two. The 2nd image looks much sharper, although I was using the aforementioned photographic camera settings.
13. Choice a Abrupt Aperture
Discontinuity also plays a role in achieving optimal sharpness. For landscape photography, I generally use apertures between f/8 and f/11, while for portraits, I use apertures of f/1.4 to f/8, depending on what I want to exercise with the background. Well-nigh lenses are sharpest betwixt f/5.6 and f/viii, so if you are shooting during a brilliant sunny day, attempt setting your aperture to a number between f/4 and f/8 and see if it makes a deviation. Just keep in mind that playing with aperture changes the depth of field and will have an impact on the lens bokeh, which are usually more of import than the sharpness effects.
14. Make clean Your Lenses!
An amateur photographer approached me in one case and asked for advice on what he could practice to bring more than dissimilarity and sharpness to his images. When I saw the front chemical element of his lens, I immediately made a proffer to make clean his lens. It was and then muddy that I couldn't believe he was still able to have pictures. A dirty and a greasy forepart element of the lens is a guarantee to inaccurate camera focusing and poor image contrast. If y'all don't know how to exercise it properly, check out my commodity on how to make clean DSLR lenses.
xv. Use a Tripod in Low Light
Get a tripod for low-light situations (see my article on how to choose a tripod). For shooting lightning storms, fireworks, urban center lights, and other absurd stuff at night, a sturdy tripod is a must! Don't buy a inexpensive tripod designed for signal and shoot cameras, simply rather invest in a heavy duty, sturdy tripod that can handle your DSLR or avant-garde mirrorless camera. Having a self-timer mode or a cable/wireless shutter release is also very helpful to minimize camera shake. The below image would not exist possible to capture without a tripod, since I took it at a shutter speed of v seconds:

16. Shoot a Outburst of Photos
Set your camera to a "continuous shooting" way (also known equally burst mode), then photograph your field of study in bursts by just belongings the shutter button. Especially if you are photographing a moving subject like children, outburst manner helps amend the odds that y'all'll get a shot that is spot-on. With most cameras today, you can fire off at to the lowest degree three photos per second, and often more like 4 or 5. With a bit of panning to follow along with your subject field, you can get sharp photos even when your bailiwick doesn't stay yet!
Sometimes, you'll go just enough of the face (of say a happily-running kid) in focus and so everything else gets blurred because of the motion, leaving you lot with a prissy isolation that highlights the emotion of that moment. This valuable tip was provided by our reader Eric.
I promise y'all liked this commodity on how to accept sharp photographs with your DSLR or mirrorless photographic camera. Delight let me know if you have whatsoever questions in the comments section below.
Source: https://photographylife.com/how-to-take-sharp-photos
Post a Comment for "How You Know if Your Photo Is Sharp"